¶ Docs (Beta)
¶ geminiware Digital Twin as a Service Platform
Welcome to the documentation for the geminiware Digital Twin as a Service (DTaaS) platform.
This documentation provides an introduction to the core functionalities of the platform, enabling you to model digital twins efficiently and leverage their full potential. You will learn how to work with the platform's features, including sharing digital twins, collaborating seamlessly, and integrating with Mixed Reality (MR) devices for an enhanced user experience.
Whether you're a beginner exploring digital twin concepts or an advanced user optimizing workflows, this documentation will guide you through the key steps to make the most of geminiware's capabilities.
The image below highlights the key UI elements of the geminiware authoring interface, which are color-coded for clarity:
-
Menu (Blue): Located at the top of the interface, the menu provides access to essential tools and functionalities, such as project settings, modeling, asset management, and 3D scene configuration.
-
Runtime (Green): This area manages the simulation and execution of digital twin. You can start step, pause, and stop the simulation, as well as monitor the system's cycle time and current runtime.
-
Tree (Yellow): On the left side, the hierarchical tree structure (also called scene graph) organizes all objects and components in the 3D scene. You can easily navigate, select, and reorganize objects with this tree.
-
3D Scene (Red): The central section displays the interactive 3D environment where you can visualize and manipulate the digital twins directly in the 3D-space. This is where all the modeling and simulation come to life.
-
Tools (Orange): Below the 3D scene, this section provides access to the programming tools, variables and charts for engineering the behavior and logic of your digital twin.
-
Object Properties (Purple): On the right side, this section allows detailed control of the selected object's properties, such as position, rotation, scale, visibility or type-specific properties.
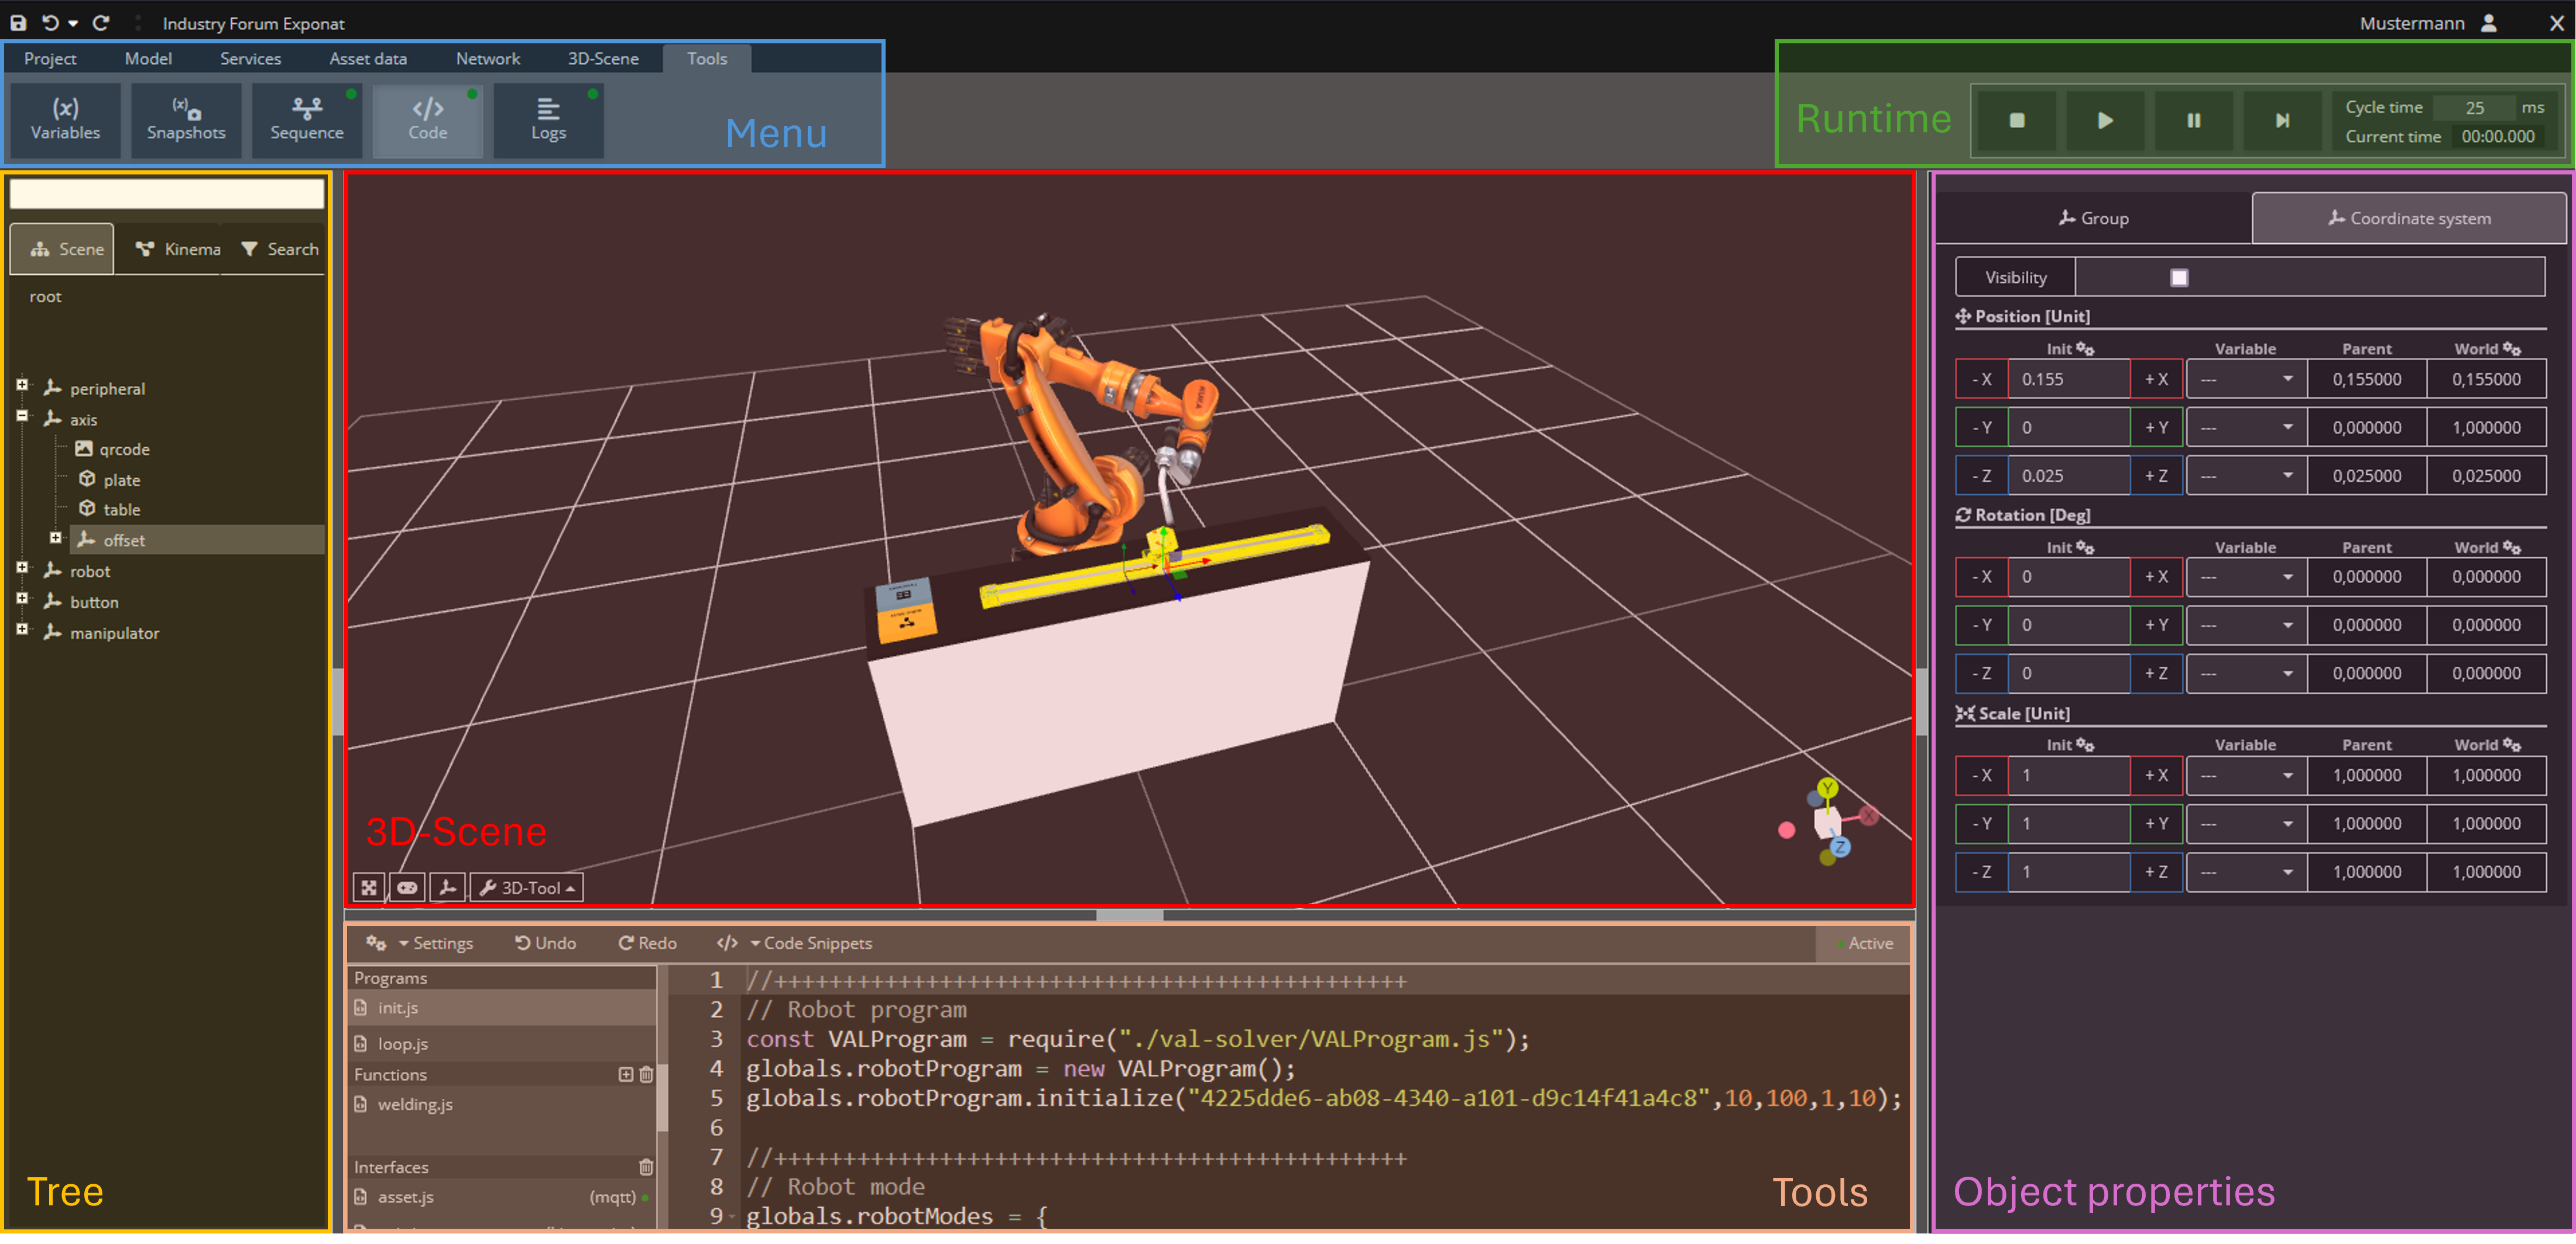
Abbildung 1: User Interface geminiware studio authoring tool